How to Make Under Stairs Storage
Table of Contents
- How to Make Under Stairs Storage
- How to Make Under Stairs Storage in 10 Simple Steps
- How to Maximise the Space Under Stairs
- The Tools and Materials You Need
- How to Make Under Stairs Storage: Step By Step
- Step 1: Do All the Hard Thinking
- Step 2: Mark Out the Drawers
- Step 3: Drill Your Hole
- Step 4: Cut the Front of the Drawer
- Step 5: Create the Support Frame
- Step 6: Build the Drawers
- Step 7: Add the Runners
- Step 8: Fit the Handles or Knobs
- Step 9: Lightly Sand Each Drawer
- Step 10: Paint the Inside of Each Drawer (Optional)
- Other Options for Under Stairs Storage
- How to Make Under Stairs Storage That Works For Your Home
- Ready To Start Your Nesta Storage Journey?
How to Make Under Stairs Storage in 10 Simple Steps
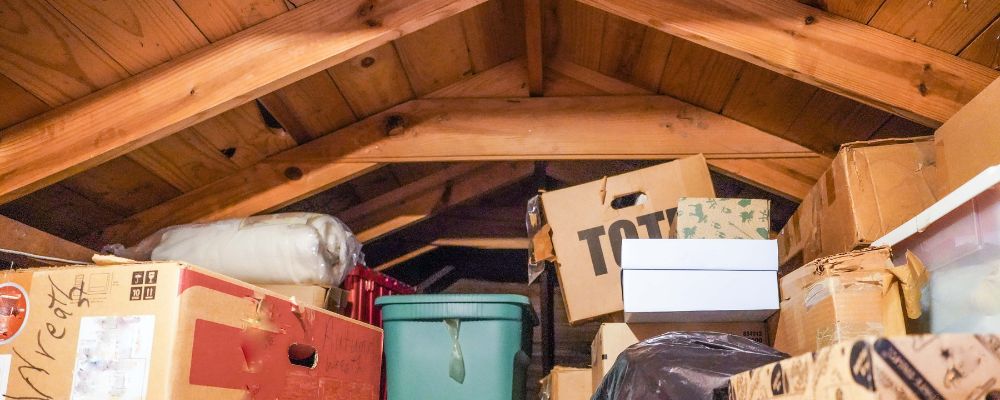
As we get older, we naturally accumulate more stuff.
From books and important paperwork to clothes and endless pairs of shoes, our once-small pile of belongings soon becomes a mountain. (Especially if you have kids!)
This then begs the question: where do we put it all when we only have one house?
Well, the good news is that there’s a handy nook of storage in your home that many of us tend to forget about.
Here’s how to make under-stairs storage for a closed stairway in 10 simple steps.
How to Maximise the Space Under Stairs
First things first, you need to take a look at the space that you’re working with.
It goes without saying that the tight area at the foot of your closed stairway isn’t going to produce much storage.
That said, to maximise the rest of the space under your stairs, you have three options: cupboards, shelves or drawers.
Let’s address each of these one by one:
- Cupboards – easy to create but difficult to get items in and out without having to physically go in there (watch your head!)
- Shelves – harder to create but easy to get items in and out, although items may fall out of each side
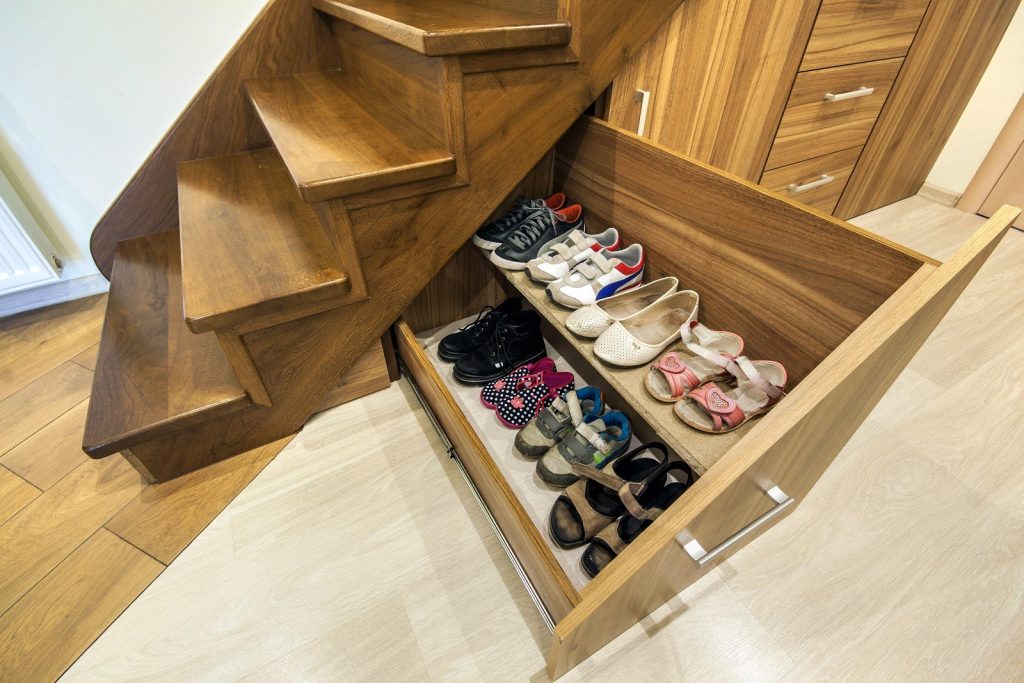
- Drawers – easier to create and easy to get items in and out while being reassured that nothing will fall out
Therefore, for the purpose of this blog post, we’re going to focus on how to build pull-out drawers under a closed stairway for DIY beginners. It just seems like the safest and most straightforward option!
The Tools and Materials You Need
Before you can begin to build your under stairs pull-out drawers, you need to gather the necessary tools and materials.
Tools
Grab yourself the following tools to make the creation process seamless:
- A cordless drill
- Jigsaw
- Hand saw
- Set square
- Tape measure
Materials
Then invest in these materials if you want to learn how to make storage space under stairs that is just as pretty as it is practical:
- A selection of screws
- Soft-close drawer runners
- 9mm Medium-Density Fibreboard (MDF) sheets
- 2×4 wood
- Drawer handles or knobs
- Paint (optional)
How to Make Under Stairs Storage: Step By Step
Ready to get started? Let’s go!
Step 1: Do All the Hard Thinking
How to make under stairs storage rule 101: decide what you’d like to use the drawers for, whether it’s your dirty laundry, summer hats or DIY tools.
Once you’ve made this decision, you can determine how much space (and how many drawers) you’ll need.
The sensible option is to create every bit of storage that you possibly can. After all, you just never know when you’re going to need more space!
Step 2: Mark Out the Drawers
Remember that you’re in control of how wide or tall your drawers are going to be. Having said that, the runners need to be able to handle the weight and fit within the allocated area.
Mark out the drawers and make an initial hole to check that the material you’re cutting into is thin enough to finish the project. You also need to check that there aren’t any electrical wires or plumbing pipes lurking around.
(Safety first, people!)
Step 3: Drill Your Hole
Next, drill a hole that is big enough to allow the jigsaw blade to get into it. Use guide bars to cut the lines of your drawer shapes as straight as possible.
Note that removing the entire wall and creating new surrounds will ensure a clean finish around your drawers. However, this requires a much more advanced DIY skillset.
Step 4: Cut the Front of the Drawer
Once you’ve got a good hole going, you should make the front of the drawer from the piece that you’re cutting.
Not only will this ensure precision in terms of the angles and fit, but it will look aesthetically-pleasing and be cohesive with the rest of your staircase. Win-win.
Step 5: Create the Support Frame
The next step when it comes to how to make under the stairs storage is to build the frame for the runners to perch on.
Keep in mind that the frame should be perfectly square. In other words, the front of the frame width should measure the same as the back so that the drawer slides effortlessly in and out.
It’s also important to fix the frame fully to the floor, front walls and back walls.
Why? Well, if there’s any movement in the frame, you may struggle to open it and close it effectively. Not ideal.
Step 6: Build the Drawers
Once the frame for the runners is in place, you can build the drawer itself.
If you’ve got items that you want to stack, you can choose to have one deep drawer with a back panel to ensure that nothing falls out. Alternatively, you can include a shelf halfway down to separate items so you can see everything more clearly.
Either way, make sure that the drawer is completely square, i.e. the measurements are the same for the front and back width.
The truth is, if you have a slight variation, you may struggle to slide the drawer in and out.
Step 7: Add the Runners
Full disclosure: it’s important to check the weight capacity of your runners before you fit them. You don’t want to have to deal with a collapsing drawer every time you pull it out!
You should also check the length and extended length of each runner to ensure that it will allow you to access the back of each drawer easily.
In terms of fitting a runner, attach it to the frame first, slide in the drawer and line the drawer up with the elongated screw-fixing points on the runner. Then screw the drawer in from the side.
You could even add some Water Displacement, 40th Formula (WD-40) to the runners to lubricate and protect them so that the drawers slide in and out more smoothly.
Step 8: Fit the Handles or Knobs
After you’ve double-checked the functionality of your drawers, it’s time to fit a handle or knob onto each drawer.
It’s completely up to you which design you choose. Just make sure that it ties in with the overall theme of your stairway, house and colour palette for a stylish yet consistent aesthetic.
To break it down for you, avoid vintage-looking black knobs if you have a bright and airy home with modern hardware and decor. It just won’t match. Capeesh?
Step 9: Lightly Sand Each Drawer
To ensure that the drawers look and feel smooth with no rough edges, remove each drawer and lightly sand it until you reach the desired effect.
Step 10: Paint the Inside of Each Drawer (Optional)
The final step in terms of how to make under-the-stairs storage is optional. However, you may want to proceed with it if the material you used to create your drawers isn’t quite the colour you were hoping for.
To combat this, simply paint the inside of each drawer in the hue that you want as the perfect finishing touch.
Other Options for Under Stairs Storage
Are you a competent DIYer? Want to challenge yourself and level-up your skills? We’ve got the solution for you!
Even though pull-out drawers are typically the most popular option for a closed stairway, people with more time, advanced skills and an increased budget have had other ideas, such as:
- An office
- A laundry room
- Open shelving
- A playroom
- A reading nook
- An artistic display
- A pet room
- A built-in bar
Pretty cool, right?
How to Make Under Stairs Storage That Works For Your Home
Under-stairs storage is typically underutilised, which is a shame when it can produce so much space!
The great news is that learning how to make under stairs storage in the form of pull-out drawers is relatively straightforward. It requires basic construction and will keep your belongings safe and in one spot while allowing quick access.
That said, every house has different walls, stair types and makeup. That’s why it’s important to focus on what’s going to make sense for you and your home to ultimately create a unique, attractive and workable space.
Still have too much clutter in your house and not enough storage? Not to worry — you can use Nesta’s self-storage units to take care of any excess.
Table of Contents
- How to Make Under Stairs Storage
- How to Make Under Stairs Storage in 10 Simple Steps
- How to Maximise the Space Under Stairs
- The Tools and Materials You Need
- How to Make Under Stairs Storage: Step By Step
- Step 1: Do All the Hard Thinking
- Step 2: Mark Out the Drawers
- Step 3: Drill Your Hole
- Step 4: Cut the Front of the Drawer
- Step 5: Create the Support Frame
- Step 6: Build the Drawers
- Step 7: Add the Runners
- Step 8: Fit the Handles or Knobs
- Step 9: Lightly Sand Each Drawer
- Step 10: Paint the Inside of Each Drawer (Optional)
- Other Options for Under Stairs Storage
- How to Make Under Stairs Storage That Works For Your Home
- Ready To Start Your Nesta Storage Journey?
Recent posts
Related Posts
- July 22, 2025|1 min read
- January 29, 2025|1 min read


